Since my last energy ball recipe was such a hit, I decided to try my luck a creating out a new flavour. A friend of my raves about these delicious treats that she buys at a health food store in Ottawa – so I took it upon myself to create my own version.Ingredients
2 cups raw cashews
1 1/3 cup shredded coconut
2 tbsp pure maple syrup
1/2 dropper of liquid stevia (or more maple syrup)
1 tsp vanilla
Directions
Mix all ingredients together using a food processor until a crumbly dough is formed. Roll into approximately 14 balls. Refrigerate for about half an hour before serving.
The store bought version uses raw almonds but I prefer the taste of cashews. I am a firm believer in using ingredients that I already have in my pantry. You could definitely try substituting to almonds [or even another type of nut] and get similar results.
Stores these delicious treats in the fridge – although I doubt they will last long in any household!
During our east coast road trip we spent a bit of time talking about other places we had driven. While I am not a fan of long car rides, a few of the passengers I traveled with had racked up some significant miles on their wheels. As we discussed our drives east and west, one place kept popping back into my head – Nanaimo, British Columbia. While I’ve never been there and have no plans to visit anytime soon, I could not stop thinking about Nanaimo Bars and how much I used to enjoy them! I knew when I got home it would be the first recipe I would test. Lucky for me [and you – since I can share it] they turned out fabulously. Perhaps not truly a Nanaimo bar, the result is delicious, smooth and just sweet enough to keep you satisfied!
Crust:
1 Cup Walnuts
1/2 Cup Soaked Dates
1/2 Cup Unsweetened Shredded Coconut
1/4 Cup Cocoa Powder
Dash of Salt
Filling:
1/4 Cup Softened Coconut Oil
1/2 Cup Soaked Cashews
1 Full Dropper of Stevia
1/4 Cup Coconut Cream*
1/2 Tsp Vanilla Extract
Topping:
1/2 Cup Soaked Cashews
1/3 Cup Cocoa Powder
1/2 Cup Coconut Oil
1/4 Cup Honey
*To make coconut cream: refridgerate one can of coconut milk – once a layer has risen to the top, scoop it off and blend with 1 tsp of vanilla
Directions
Blend all of the crust ingredients in a food processor or blender until dough-like. Place in the bottom of 12 silicon muffin liners. I used two silicon muffins tins with 6 holes in each. If you don’t have silicon pans you will want to line each muffin hole with Saran Wrap, otherwise it will be near impossible to remove the finished product. Make sure you pat the crust down firmly.
Next add all of the filling ingredients and blend well until a uniform texture is achieved. You may need to stop and scrape down the sides a few times. Once the filling is well blended, spoon over the crust in the muffin tins.
Finally, blend [using your food processor or blender] all ingredients for the topping. It is okay if this layer is a bit crumbly. Spread evenly over the crust and filling mixtures.
Freeze for 3-4 hours and serve. These taste best when they have been thawed for about 5 minutes prior to eating. Store any leftovers in the freezer.
Thanks Nanaimo, BC, for inspiring me to make such a delicious treat!
I’ll admit it, I’ve been on a complete baking tear these days. Usually when this happens, about 50% of the recipes I make turn out to be worthy of adding to me repertoire. This time, I have yet to find a miss, everything has been absolutely delicious. These muffins are no exception – and I know they are great because Neil was disappointed when we ran out!
3/4 cup almond butter
1/4 cup peanut butter (you can use 100% almond butter instead)
3 tablespoons honey
2 eggs
½ teaspoons vanilla extract
1 teaspoon apple cinder vinegar
½ teaspoon baking soda
¼ cup unsweetened carob chips (or chocolate chips)
Directions
Preheat the oven to 350°F.
Mix the honey, eggs, vanilla, apple cinder vinegar and baking soda in a bowl.
Add the almond butter and peanut butter and mix well. Fold in the carob chips.
Spoon batter into nine paper lined muffin cups or a silicon muffin tin and bake for about 25 minutes or until a toothpick inserted into the center comes out clean.
Allow time to cool before serving.
Serve and enjoy!
Another easy as can be, healthier recipe!
xo Lauren
PS – Don’t forget to enter the Revlon Haute Tropics nail polish giveaway!!
I’ve been craving carrot cake with cream cheese icing something fierce lately! I don’t know why, since I was never a huge fan of the dessert, but after weeks of carrot dreams I knew I had to come up with a healthy alternative. These muffins/cupcakes are simple, delicious and the perfect summer treat because you don’t even need to touch your oven!
Raw, Vegan, Grain-Free Carrot Muffins with Cashew Cream “Cheese” Icing Adapted from: Chef Amber Shae
Ingredients For the cake:
1 cup pitted dates, soaked in warm water for 15 minutes and drained
1/4 cup water
1 tablespoon lemon juice
1 teaspoon vanilla extract
1 teaspoon ground cinnamon
1/4 teaspoon sea salt
1 pound carrots, peeled if desired, shredded
3/4 cup coconut flour
Stevia to taste (optional)
For the Cream “Cheese” Icing:
3/4 cup cashews soaked for 2 to 4 hours and drained
1/2 cup nondairy milk of choice
1 1/2 teaspoons lemon juice
15 drops liquid stevia, or to taste
Pinch of sea salt
Directions
Combine the drained dates, carrots, water, lemon juice, cinnamon, salt and vanilla in a food processor and blend until almost smooth and well combined.
Add the coconut flour and stir until the batter is combined and uniform. Taste the batter, and if you think it needs a little more sweetness, add stevia to taste. Set the batter aside for 5 to 10 minutes to allow the coconut flour to absorb the liquid mixture.
Fill 8 silicone muffin tins with the mixture and place in the freezer for at least 4 hours.
To make the cashew cream “cheese” icing, combine all ingredients in a blender [I used my Magic Bullet] and pulse until smooth. Place the icing in the fridge until you are ready to decorate your carrot muffins.
Just a note: these muffins taste best when you allow them to defrost for at least 30 minutes so remove them from the freezer with that in mind!
Now you can have your [carrot] cake and eat it too!
xo Lauren
I love cheesecake, like more than you can imagine… but when I became lactose intolerant it was one of the first things I had to give up. It has taken me a few years to find a replacement that I enjoy just as much, probably because my criteria was quite strict – no dairy, no grains and all natural – lo and behold – I found the perfect recipe, and today I am going to share it with you!
Read this recipe with an open mind. When I serve it to guests I never tell them the ingredients until after they have asked for seconds. I promise it is absolutely divine and almost entirely guilt free. Although this recipe has three parts, it is one of the easiest desserts in my repertoire. Make these – this is not a suggestion, you’ll thank me later!
Raw Chocolate Swirl Cheese[LESS]cake
Recipe from: The Detoxinista [my favourite healthy cooking blog]
Step One
Chocolate Crust:
1 cup raw pecans
2 Tablespoons cocoa powder
2 Tablespoons pure maple syrup
1 Tablespoon coconut oil
1/2 teaspoon vanilla extract
1/4 teaspoon sea salt
Directions:
Using a food processor or high power blender, add the pecans and pulse until you achieve a crumb texture – do not over process as you’ll end up with pecan butter, which is not the objective here. Once the pecans are “crumbed” add the rest of the ingredients and blend until well combined. You may need to scrape down the sides to make sure everything is incorporated. Remove the mixture from the food processor and transfer the it to a square 6″ Tupperware, lined with plastic-wrap, and press down evenly. Place the Tupperware in the freezer for at least 10 minutes to allow it to set. During this time you can start the next step – the filling.
Step Two
Cheesecake filling:
1 cup cashews, soaked for at least an hour
1/2 cup zucchini, peeled and chopped
2 1/2 Tablespoons fresh lemon juice
2 Tablespoons coconut oil
1/4 cup honey
1/2 teaspoon vanilla extract
1/4 teaspoon sea salt
Directions:
Combine all above ingredients in a food processor or high power blender and mix until completely combined and smooth. Pour the filling over the chocolate crust and smooth the top using a spatula.
Step Three
Chocolate Swirl:
2 Tablespoons cocoa powder
1 Tablespoon pure maple syrup
1 Tablespoon coconut oil, in liquid form
Directions:
Whisk together all ingredients until smooth and fully combined. Spoon three lines [parallel to each other] across the cheesecake filling. You will be swirling them soon so it doesn’t have to be perfect. It should look something like this:
Using a knife and a light touch, drag a knife through the top of the cheesecake back and forth perpendicularly to the lines you made– creating a marbled look like this:
Place in the freezer for at least 4 hours. When you are ready to serve, you should be able to remove the cheesecake from the Tupperware by lifting the plastic-wrap and then slice into 12 squares. Store and extra in the freezer as they will melt quite quickly. Make sure you serve them chilled.
Now make your way to the kitchen and give it a shot – this is one recipe I just cannot live without!
There is nothing I like more than a simple, healthy and delicious recipe – and that is exactly what I am sharing with you today. Careful though, these blondies are extremely addictive.
Grain and Dairy Free Blondie Squares
Recipe slightly adapted from: The Detoxinista
Ingredients
1 cup natural creamy peanut butter
1/3 cup honey
1 whole egg 1/4 teaspoon sea salt (omit this if the peanut butter is already salted)
1/2 teaspoon baking soda
1/2 cup carob chips
Directions
Preheat oven to 350F and grease an 8″ square pan with coconut oil.
In a small bowl, mix the peanut butter, honey, egg, salt and baking soda until well combined.
Fold in carob chips.
Pour the batter into the greased pan, and use a spatula to smooth the top.
Bake for 20 minutes, or until the top is golden brown.
Remove from the oven, cool, cut into 16 squares and ENJOY!
I am sure you are all well aware by now that my favourite treats to bake are ones that I can eat [which means no gluten or dairy]. It is definitely takes some practice to make recipe substitutions but once you realize that it is okay to go wild in the kitchen – you end up with some amazing baked goods that are healthy and delicious!
Grain, Dairy and Sugar Free Chocolate Mini Muffins
1/4 cup coconut flour
1/4 cup cocoa powder
1/8 teaspoon sea salt
1/2 teaspoon baking soda
3 eggs
1/4 cup coconut oil, melted
1/3 cup sugar free maple syrup
1 tablespoon vanilla extract
Directions
Preheat the oven to 350F and line a mini muffin tin.
In a medium bowl, combine the coconut flour, cocoa powder, sea salt and baking soda.
Add the eggs, coconut oil, maple syrup, and vanilla and whisk again until a smooth batter is achieved.
Using a spoon, evenly fill the muffin tin. This batch makes about 18 mini treats. Do not overfill as the batter rises.
Bake for approximately 15 minutes, testing with a toothpick after 12 minutes.
Allow to cool and enjoy.
These muffins are quite delicious as is, however, if you want a real treat – add a chocolate glaze.
Easy Chocolate Glaze
Ingredients
3 large squares of dark chocolate (70 – 80% darkness)
1 – 2 tsp of coconut oil
Directions
Heat the chocolate and coconut oil and stir until well combined and completely melted. I use the microwave for this.
Dip the tops of the muffins in the glaze and place in the fridge to harden.
Hope you enjoy these delicious chocolate treats as much as I did!
I seem to have a lot of success when using pureed pumpkin in my baking. Not only do the recipes taste delicious and savory, but they are always soft and have the perfect texture. Today’s health-ified pumpkin loaf proves me right once again. As usual this is an extremely easy recipe to follow with very few ingredients.
1¼ cup almond flour
1¼ teaspoon baking soda
pinch of salt
heaping ½ teaspoon of cloves and cinnamon
heaping ¼ teaspoon nutmeg
1 cup pumpkin
2 droppers full of liquid Stevia (if you want this to be a sweet treat use 3)
⅓ cup melted coconut oil + a bit extra for greasing the loaf pan
3 eggs
⅓ cup water
Directions
1. Preheat the oven to 325 degrees.
2. Combine all ingredients in a large bowl and mix well [I used a fork to mix].
3. Grease a loaf pan with coconut oil to ensure that you’ll be able to remove the pumpkin bread once it has finished baking.
4. Pour mixture into loaf pan and spread around so it is spread out evenly in the loaf pan and place in the oven for about 1 hour and 10 minutes.
5. Allow to cool – or not – serve and enjoy!
I like to eat mine warm topped with coconut butter, it is so delicious [and healthy enough to have for breakfast]!
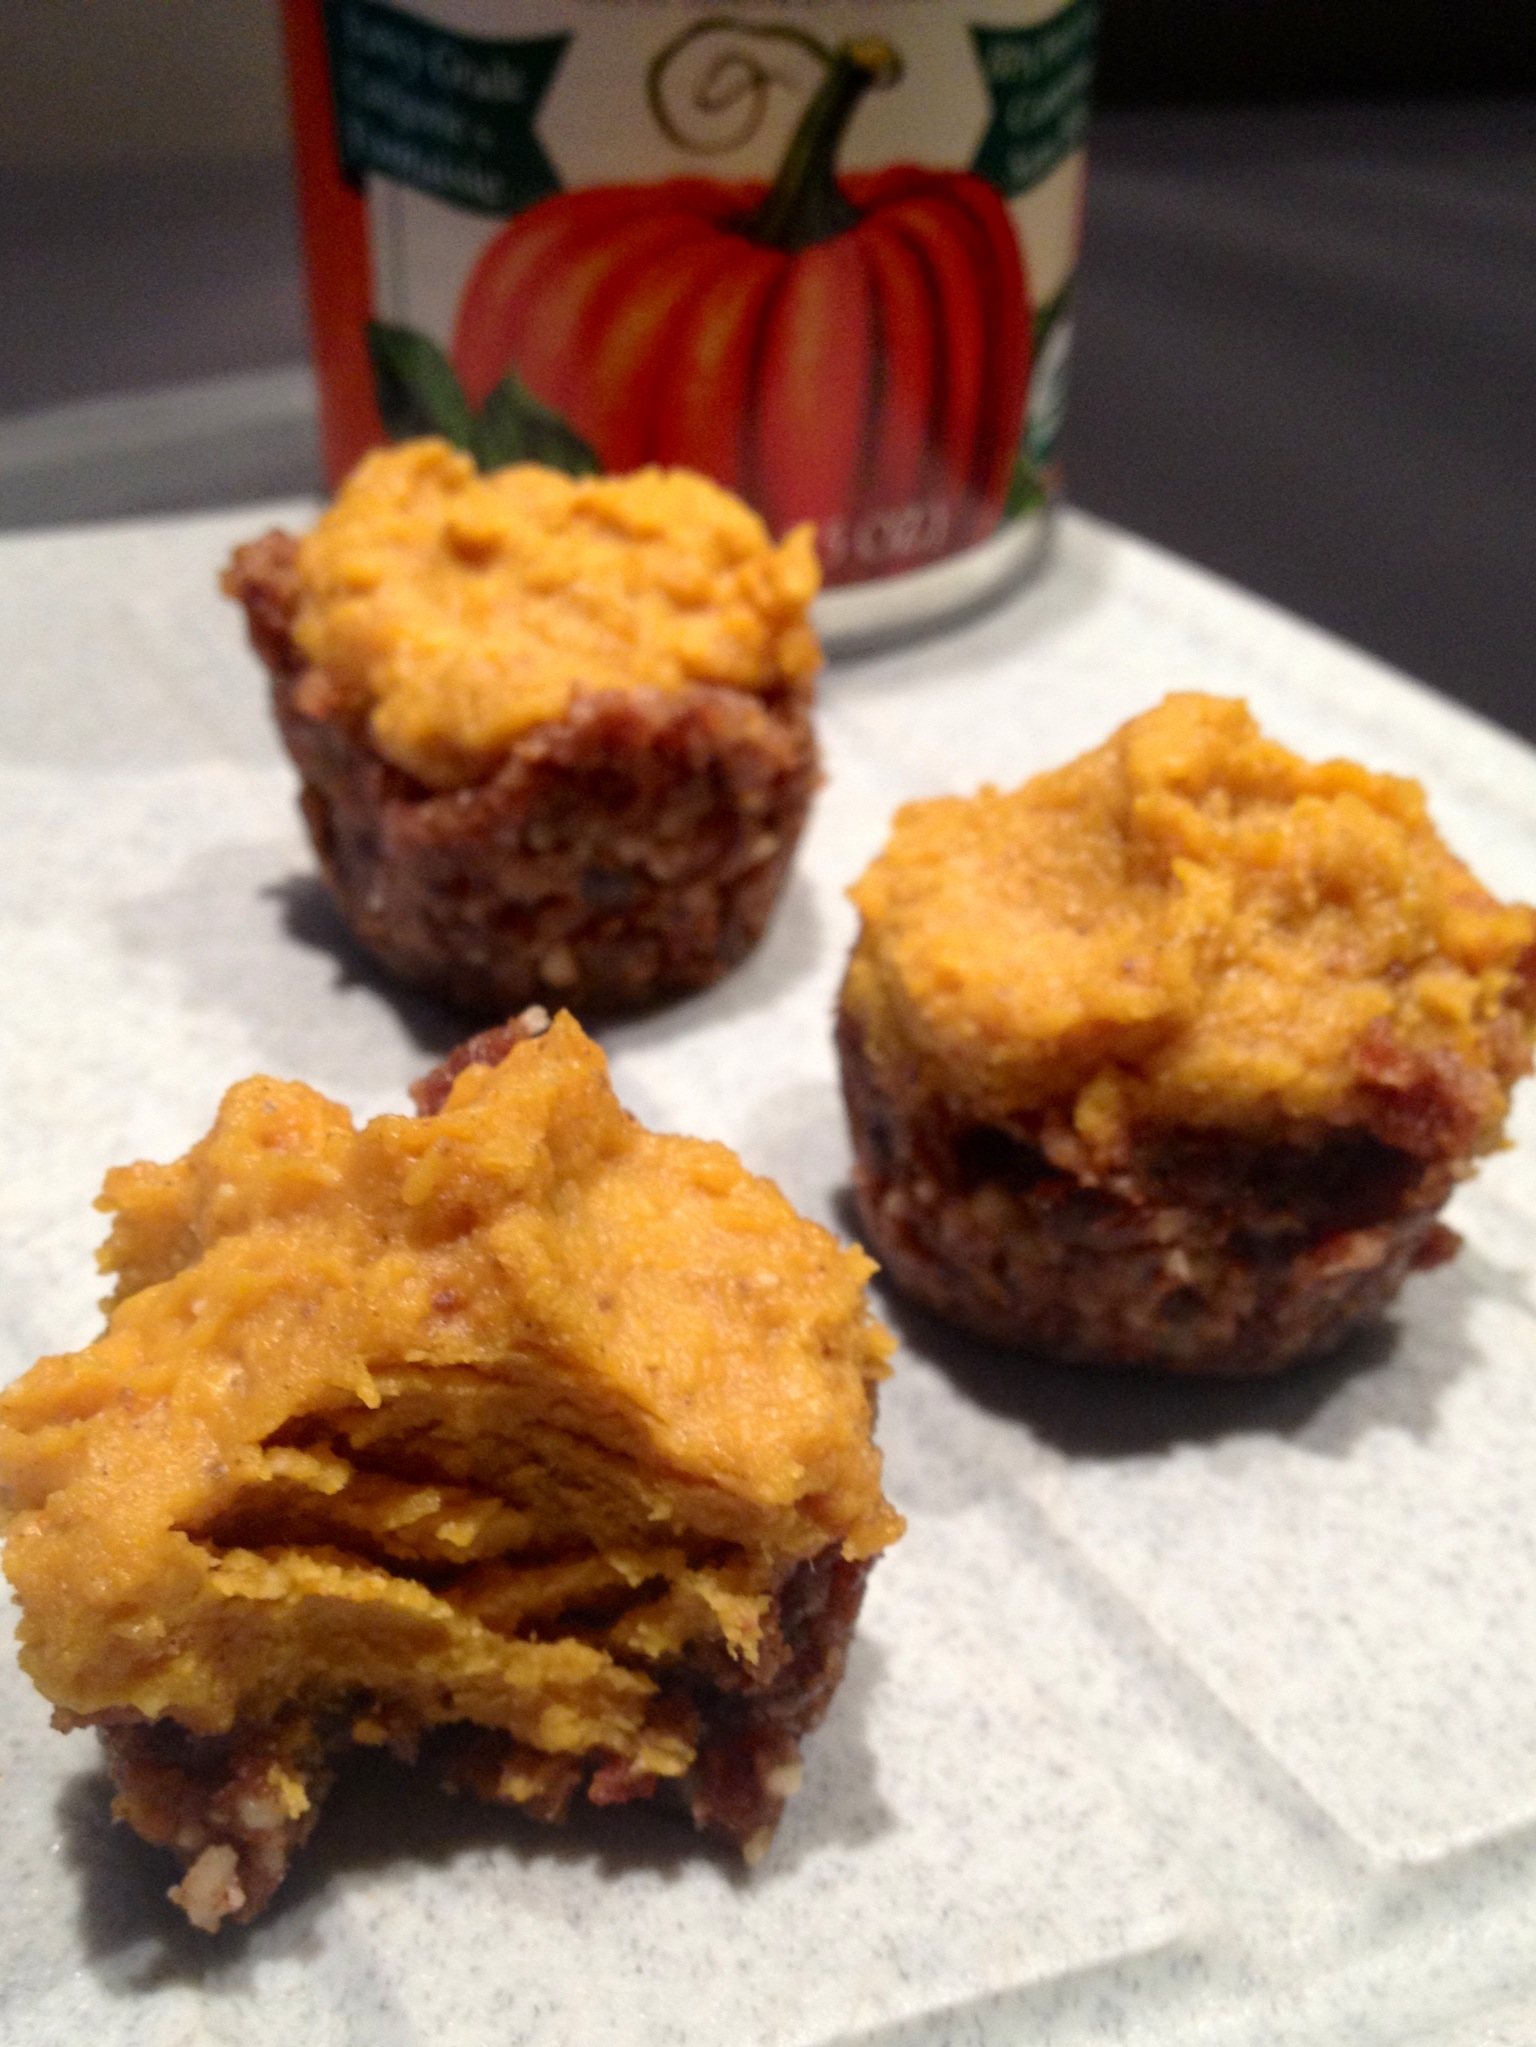
I am really sharing this recipe at an odd time of the year. Pumpkin season has long passed, but I just couldn’t resist bringing it back to make these tiny, tasty treats. Luckily, pumpkin puree is quite easy to find year round at most natural food stores so you can make these no bake pumpkin bites too! Oh and they are healthy – not that you could tell by tasting them.
Crust:
1 lightly packed cup cooking dates
2/3 cup raw pecan (or walnut) halves
1/2 tsp ground cinnamon
Filling:
2 tbsp coconut butter (not oil) at room temperature
1/2 cup 100% cooked pumpkin puree at room temperature
2 Tbsp pure maple syrup, preferably grade B
1/2 tsp pure vanilla extract
1/2 tsp ground cinnamon
1/4 tsp ground ginger
1/8 tsp ground nutmeg
1/8 tsp ground cloves
Directions
In a food processor, combine nuts, dates and cinnamon. You may want to put the dates in first and pulse a bit to chop them. Process until mixture becomes crumbly which should take about a minute. Remove from food processor.
In a bowl, combine coconut butter and pumpkin puree. Make sure that both are at room temperature – if not the coconut butter will become too solid and will not mix well. If this happens, microwave the mixture for no more than 20 seconds.
Add the remaining ingredients to the pumpkin and coconut butter mixture and stir until it is very smooth.
Divide the crust evenly among 12 cups of a mini muffin tin.
Using a wet finger press the crust into the tin and make an indentation in each.
Fill each indentation with the pumpkin filling.
Place the muffin tin in the fridge for at least two hours or until firm.
Just a warning. These little bites are extremely stubborn to remove from the muffin tin. I found the best method to coerce them out was to use a toothpick to loosen them around the outer edge, then pop them out. As long as they are firm they will not fall apart.
Store in an air tight container in the refrigerator.
Who doesn’t love cookies for breakfast?! I know I do – but the thought of dessert to start the day makes me feel ever-so guilty. What if you could indulge without that feeling? This raw, vegan, gluten free recipe is the answer to your cookie prayers.
A healthy treat that you can feel good about devouring!
Slightly less than 1 cup of almond flour (or 1 cup of almonds ground into flour)
1 tsp vanilla
coarse sea salt
Directions
Combine all ingredients (except for the salt) in a food processor and blend until a dough like consistency is formed. This is take about 5 minutes. It is okay if you still have a few larger pieces of dates. I would not recommend attempting this recipe if you do not have a food processor or an extremely high power blender.
Remove dough and roll into 12 balls. Flatten each one (with a fork if you want the traditional PB cookie look)

 Ingredients


![Raw Chocolate Swirl Cheese[LESS]cake](https://ellepottsie.wordpress.com/wp-content/uploads/2013/04/photo-3-6.jpg)